Prerequisites
1. Configure Your Liftoff Integration
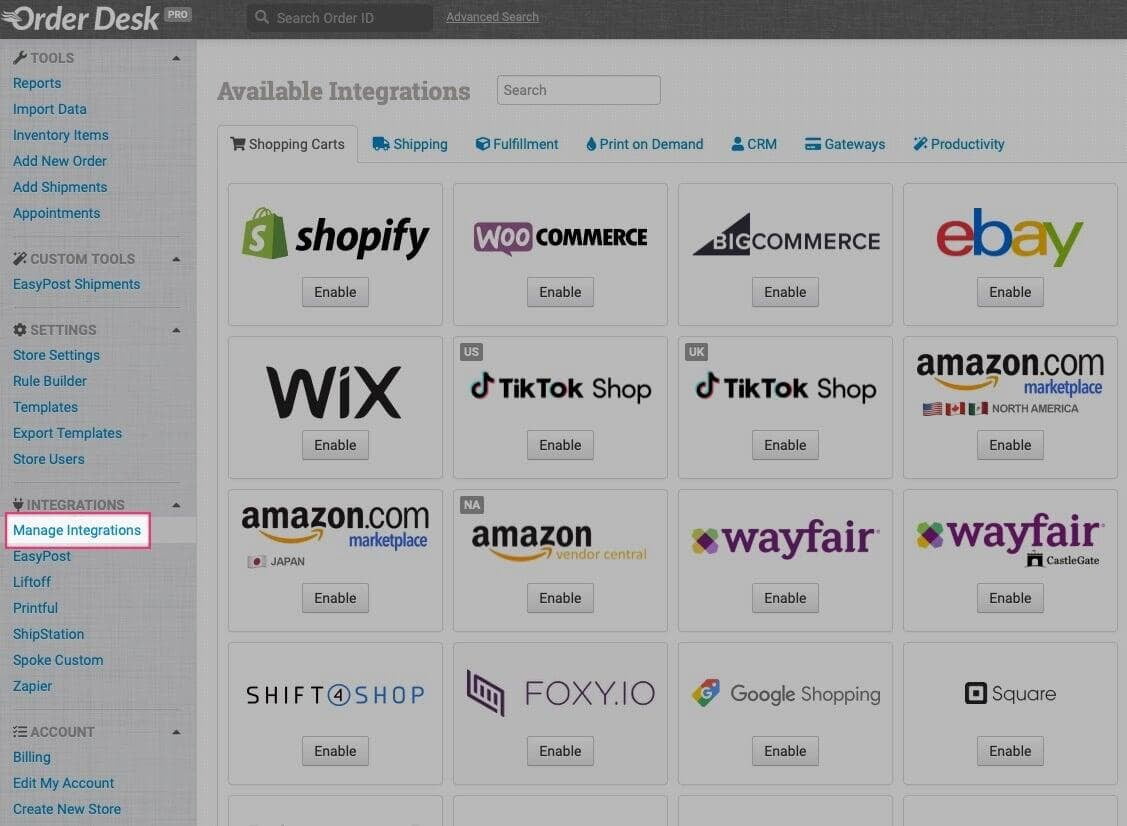
To add the Liftoff integration to your Order Desk account, follow these steps: In the left navigation, click on Manage Integrations, search for Liftoff, and click the Enable button.
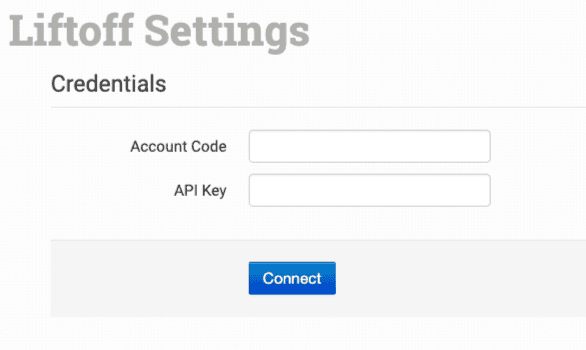
You'll be asked for your Liftoff Account Code and API Key. Every store in Liftoff has an account code; to find it, in the left navigation click on All Accounts. You can find your admin user's API key by clicking on your name in the top navigation of Liftoff, navigating to your Profile, and then clicking on API settings.
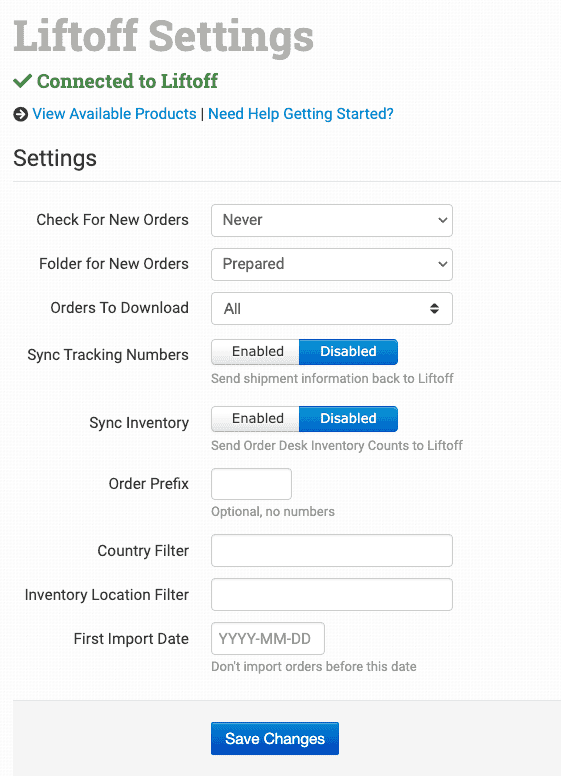
Orders to DownloadYou'll likely want to set this to In Process. That way, orders don't flow into Order Desk until they are actually submitted by the customer.Sync Tracking NumbersEnable this if you want tracking numbers from Rupt to automatically be pushed back up to Liftoff, triggering your shipping notification emails to your customers.
2. Configure Your Rupt Integration
To connect to Rupt, navigate to Manage Integrations, search for Rupt, and click Enable. Enter your Rupt Partner ID and API Key (you'll need to get these from Rupt before continuing).
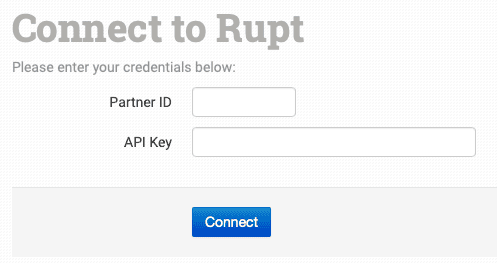
You'll now see a screen of additional Rupt settings. For demonstration, we'll leave these at their defaults. If you decide to use this integration for a live store, definitely review what each of these do here.
3. Set Up Vendor and Product in Liftoff
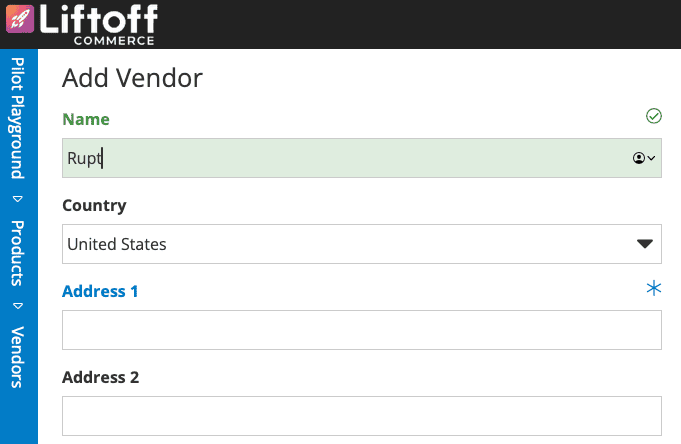
Now that the Rupt vendor is created, let's assign them to a Fulfillment Workflow by navigating to Products > Fulfillment Workflows. You can name the workflow "Rupt" and then select your new Rupt vendor as the Default Workflow Vendor.


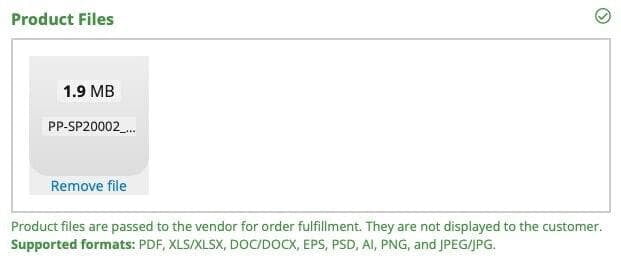
Product ClassificationSet the product classification to the one we set up for Rupt products earlier. This will make it so that when we add our custom field values, the print_sku field will be visible to us.Fulfillment WorkflowSet the fulfillment workflow for this item to Rupt – the fulfillment workflow that we set up earlier. This is important because, in Order Desk, we'll create a rule based on this product coming from this vendor.Product FilesUpload your production-ready artwork file here. Be sure to work with your Rupt contact to make sure your artwork is setup correctly.
Personalize with Pageflex
One of Liftoff's unique features is its support for Pageflex. Pageflex is a personalization engine that allows customers to customize and view an instant online proof, right on your storefront. On the back-end, a production art file is created for the customer's order.
If you want the product to be customizable for the user, rather than upload a static art file as described above, you can work with the Liftoff team to build a Pageflex template that will allow personalization – then upload the template to Liftoff. The URL for the Pageflex generated production file will be available in Order Desk just like the static art file will be in later steps.
Note: Pageflex templates, by default, output PDF files but Rupt requires a PNG, to physical imprint dimensions (with bleed for tech items and to safe area for non-tech items), at 300dpi. If your Rupt product requires a PNG be sure to configure your template to output a PNG production file.
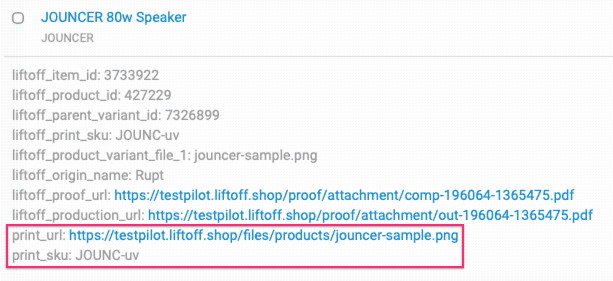
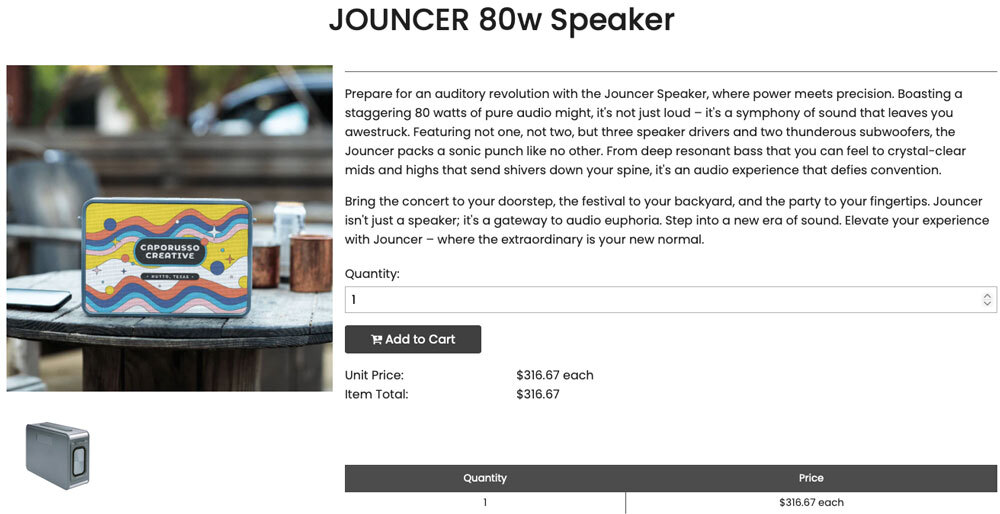
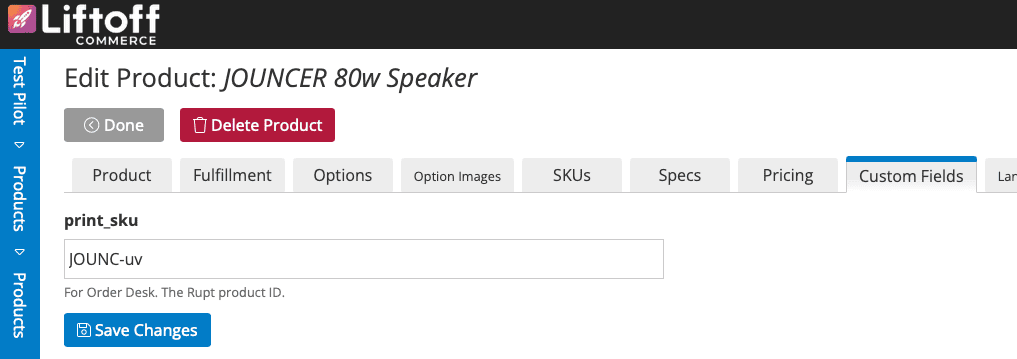
Custom FieldsBecause we set our product classification for this item to Rupt, we're now able to enter a SKU into our product_sku field. For this example, we're choosing the Jouncer 80w Speaker SKU JOUNC-uv, which we'll enter into this field. Note: You'll need to work with your rep at Rupt to get a list of valid SKU values.
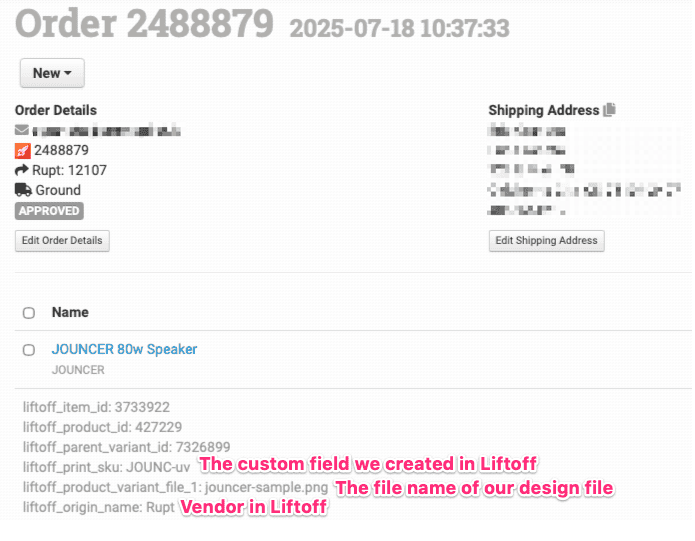
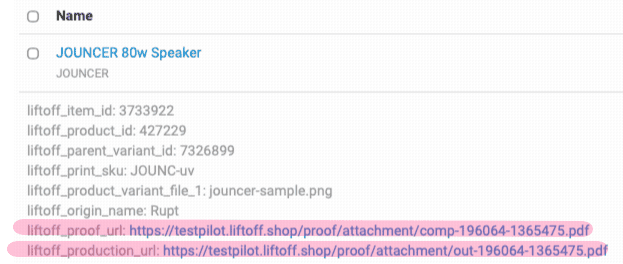
Using Pageflex-generated files – If you have a Pageflex template assigned to your product you will see two file URLs output in the line item metadata. Rather than mapping the static file to the print_url metadata field as seen below, you could simply grab the production file URL. Note: Make sure your template's output conforms to what Rupt requires.
4. Set Up Order Desk Rules


Turn your rules on and brace yourself for something... magical. ✨
5. Place A Test Order!